Building Local MCP Servers With FastMCP And Claude
The best way to truly understand the Model Context Protocol (MCP) is to stop thinking about it only as a theoretical protocol and start building actual servers that can communicate with AI clients. Once you experience an MCP server running locally on your own machine, exposing tools to an AI assistant, and responding to natural language requests, the entire ecosystem suddenly becomes much clearer.
In this tutorial, we will build a local MCP server step by step using Claude Desktop and the FastMCP library. Instead of immediately jumping into a large or complicated project, we will first create a very small MCP server that exposes two tools:
- A dice rolling tool
- A tool that adds two numbers
Although these examples are intentionally simple, they are extremely valuable because they teach the complete workflow of MCP server development. You will learn how to initialize a project, install dependencies, create MCP tools, debug the server, and finally integrate the server with Claude Desktop.
MCP Is a Protocol, Not Just a Library
One of the most important conceptual clarifications in the transcript is that MCP itself is a protocol.
A protocol is essentially a set of rules that define how systems communicate. MCP defines how AI hosts, tools, prompts, resources, transports, and messages should behave.
In theory, you could implement MCP completely from scratch in Python or any other programming language. However, doing so would quickly become difficult because you would need to manually implement:
- Message handling
- Protocol compliance
- Tool registration
- Transport management
- Capability negotiation
- JSON-RPC communication
Not only would this be complicated, but it would also lead to large amounts of repetitive boilerplate code whenever you build multiple servers.
This is why SDKs and abstraction libraries exist. They simplify the implementation process while still following the MCP specification underneath.
Understanding MCP SDK vs FastMCP
One of the biggest sources of confusion for beginners is the existence of two names in the MCP ecosystem:
- MCP SDK
- FastMCP
At first glance, these appear to be competing systems, but the relationship is actually more nuanced.
Initially, the official MCP SDK was released to simplify MCP development. The SDK contained libraries for:
- MCP servers
- MCP clients
- MCP command-line tools
This helped developers avoid implementing the entire protocol manually. However, the early versions of the SDK still required a significant amount of verbose and boilerplate-heavy code.
Even simple servers required surprisingly large implementations.
The Problem with Early MCP SDK Development
The transcript highlights an important issue with the first generation of MCP SDK development.
Even a tiny server that simply added two numbers required a large amount of setup code. Developers needed to manually configure transports, manage initialization logic, and write repetitive structures for even the smallest tools.
This created two problems:
- The developer experience was intimidating for beginners.
- Productivity suffered because too much code was required for small tasks.
At that point, a higher-level abstraction became necessary.
How FastMCP Simplified MCP Development
This problem led to the creation of FastMCP. FastMCP acts as a developer-friendly abstraction layer built on top of the MCP SDK. Its primary purpose is to dramatically simplify MCP server creation.
Instead of manually configuring large portions of the server lifecycle, FastMCP allows developers to focus mainly on the actual tools they want to expose. The difference is substantial.
With FastMCP, creating an MCP tool often becomes as simple as:
- Creating a Python function
- Decorating it with
@mcp.tool
That simplicity is one of the reasons FastMCP became widely adopted in the MCP ecosystem.
Building Local MCP server
Step 1 — Install UV Package Manager
The tutorial uses UV instead of traditional pip workflows because FastMCP recommends it for modern Python project management.
Open your terminal and run:
pip install uv
If UV is already installed, the terminal will show that the requirement is already satisfied.
Step 2 — Create a New Project Folder
Create a new folder for your MCP server project. Example:
demo-mcp-server
Now open this folder inside Visual Studio Code or your preferred editor.
Step 3 — Initialize the Project Using UV
Open the terminal inside the project folder and run:
uv init .
The . means “initialize the current directory.”
After running this command, UV generates the basic project structure, including a main.py file where we will write our MCP server code.
Step 4 — Install FastMCP
Now install FastMCP into the project.
Run:
uv add fastmcp
This installs FastMCP and all required dependencies.
Enable virtual environment:
.venv\Scripts\activate
Step 5 — Verify FastMCP Installation
You can verify that FastMCP was installed correctly by running:
fastmcp version
You should see information such as:
- FastMCP version
- MCP version
- Python version
- Operating system details
This confirms that the environment is ready.
Step 6 — Create the Local MCP Server
Now we will write the actual MCP server code.
Open main.py and replace its contents with the following code.
from fastmcp import FastMCP
import random

# Create MCP server instance
mcp = FastMCP("Demo Server")

# Dice rolling tool
@mcp.tool
def roll_dice(count: int = 1) -> str:
    """
    Roll one or more dice and return the results.
    """

    rolls = []

    for _ in range(count):
        rolls.append(random.randint(1, 6))

    return f"Dice rolls: {rolls}"

# Add numbers tool
@mcp.tool
def add_numbers(a: int, b: int) -> str:
    """
    Add two numbers and return the result.
    """

    result = a + b

    return f"The sum is {result}"

# Run the MCP server
if __name__ == "__main__":
    mcp.run()
Understanding the MCP Server Code
Although the server is small, several important MCP concepts are hidden inside this code.
First, we import the FastMCP class and create a server instance:
mcp = FastMCP("Demo Server")
This creates the MCP server object and assigns the name "Demo Server" to it. This name later appears inside Claude Desktop.
Understanding the Tool Decorator
The most important line in the entire server is:
@mcp.tool
This decorator converts a normal Python function into an MCP tool.
Without this decorator, the function is just regular Python code. With the decorator, FastMCP exposes the function to MCP clients such as Claude Desktop.
Understanding the Dice Tool
The first tool is:
def roll_dice(count: int = 1)
This tool accepts the number of dice to roll. Internally, it uses Python’s random.randint(1, 6) to simulate dice values.
For example:
- roll_dice(1) → [4]
- roll_dice(2) → [3, 6]
Even though this tool is small, it demonstrates how MCP tools can accept parameters and return structured results.
Understanding the Add Numbers Tool
The second tool simply adds two numbers.
def add_numbers(a: int, b: int)
This demonstrates how MCP tools can accept multiple parameters and return computed values.
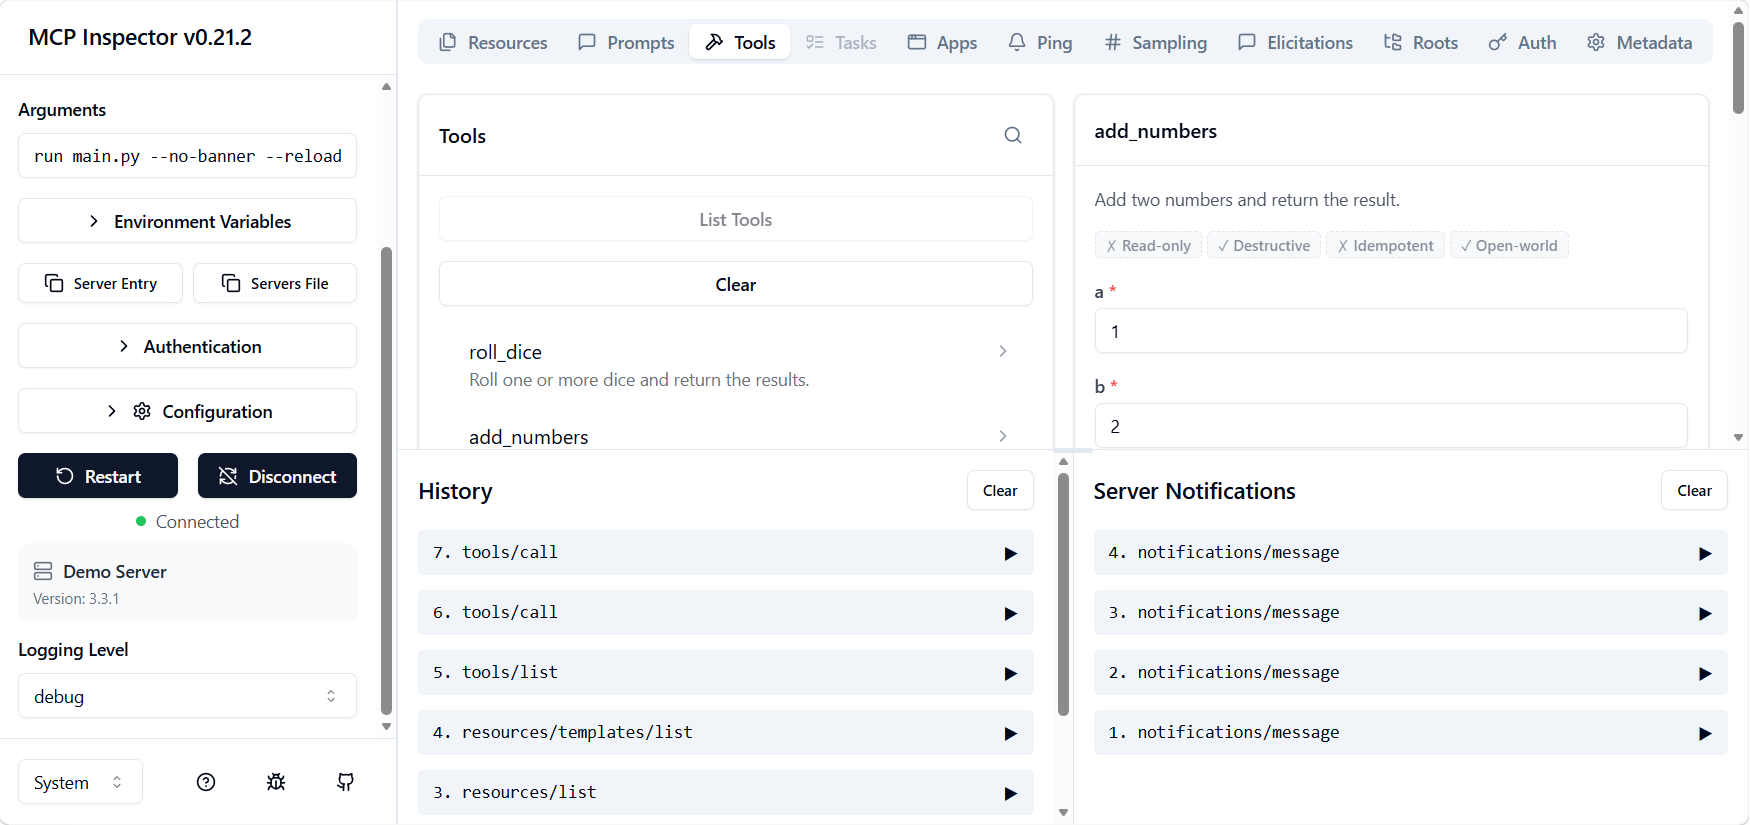
Step 7 — Debug the MCP Server Using MCP Inspector
Before integrating the server with Claude Desktop, it is a good idea to test it independently.
FastMCP includes a debugging utility called MCP Inspector.
Run:
fastmcp dev inspector main.py
This launches MCP Inspector in your browser.
Understanding STDIO Transport
The transcript mentions that this local server uses STDIO transport.
STDIO means communication happens through:
- Standard Input
- Standard Output
Since both the MCP client and server are running on the same machine, STDIO is the simplest and most efficient communication mechanism.
Install tool - Update claude_desktop_config.json
"mcpServers": {
    "demo-server": {
      "command": "D:\\code-practice\\demo-mcp-server\\.venv\\Scripts\\python.exe",
      "args": [
        "D:\\code-practice\\demo-mcp-server\\main.py"
      ]
    }
  }
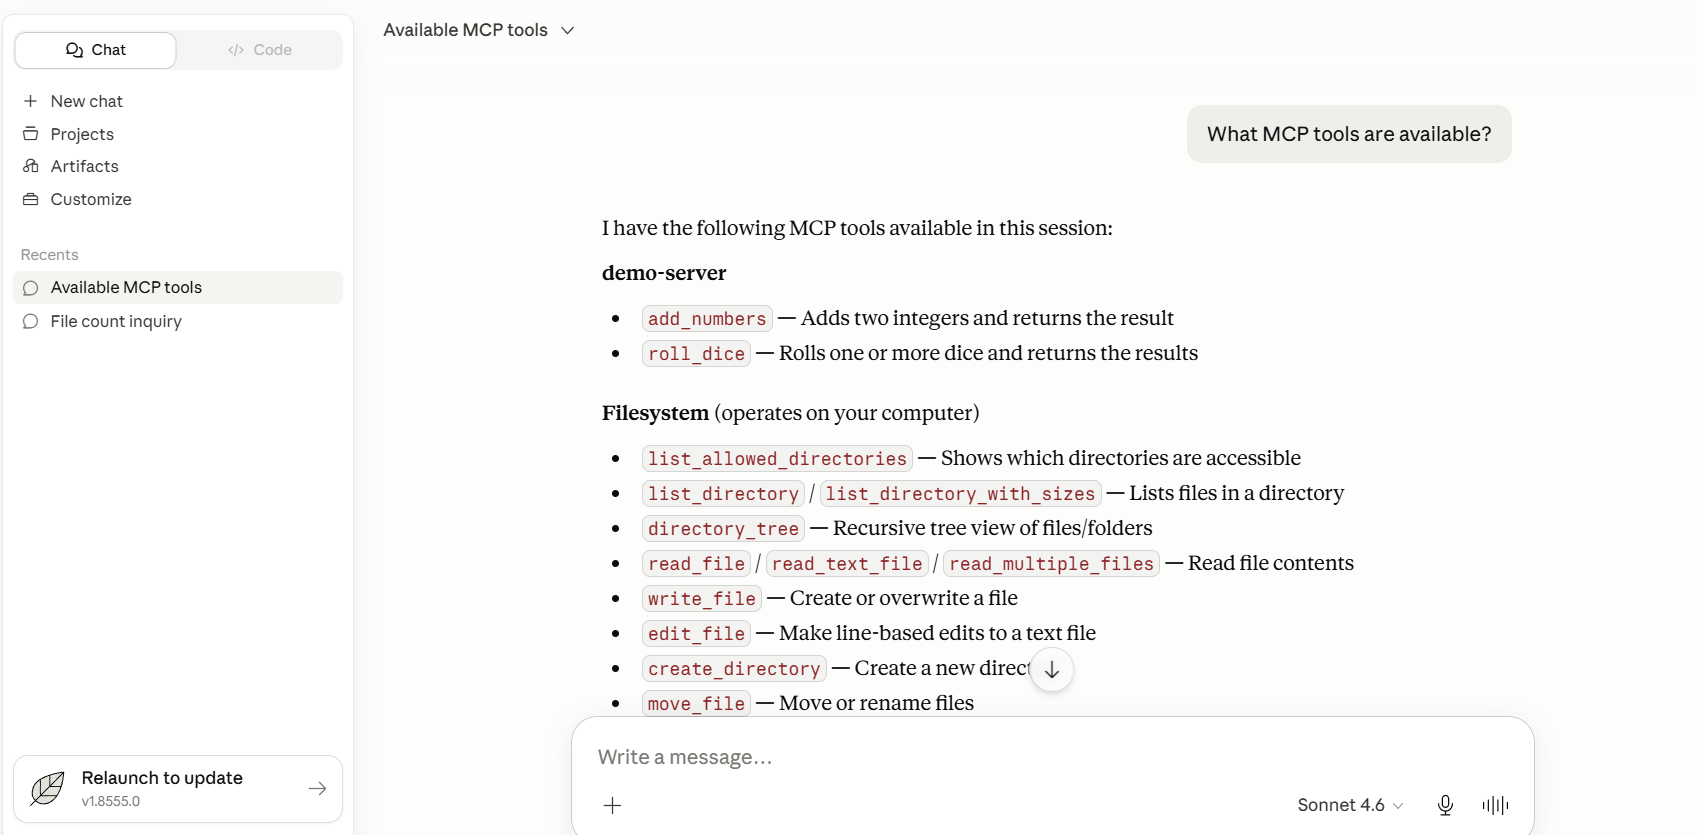
List Tools
Now ask Claude to list tools. You should get something like this:
Test MCP Tools Through Natural Language
Now comes the most exciting part. Inside Claude Desktop, try:
Roll a die
Claude Desktop should invoke your MCP tool automatically.
Now try:
Roll two dice
Possible output:
Dice rolls: [4, 2]
Similarly:
Add 234 and 567
Expected output:
The sum is 801